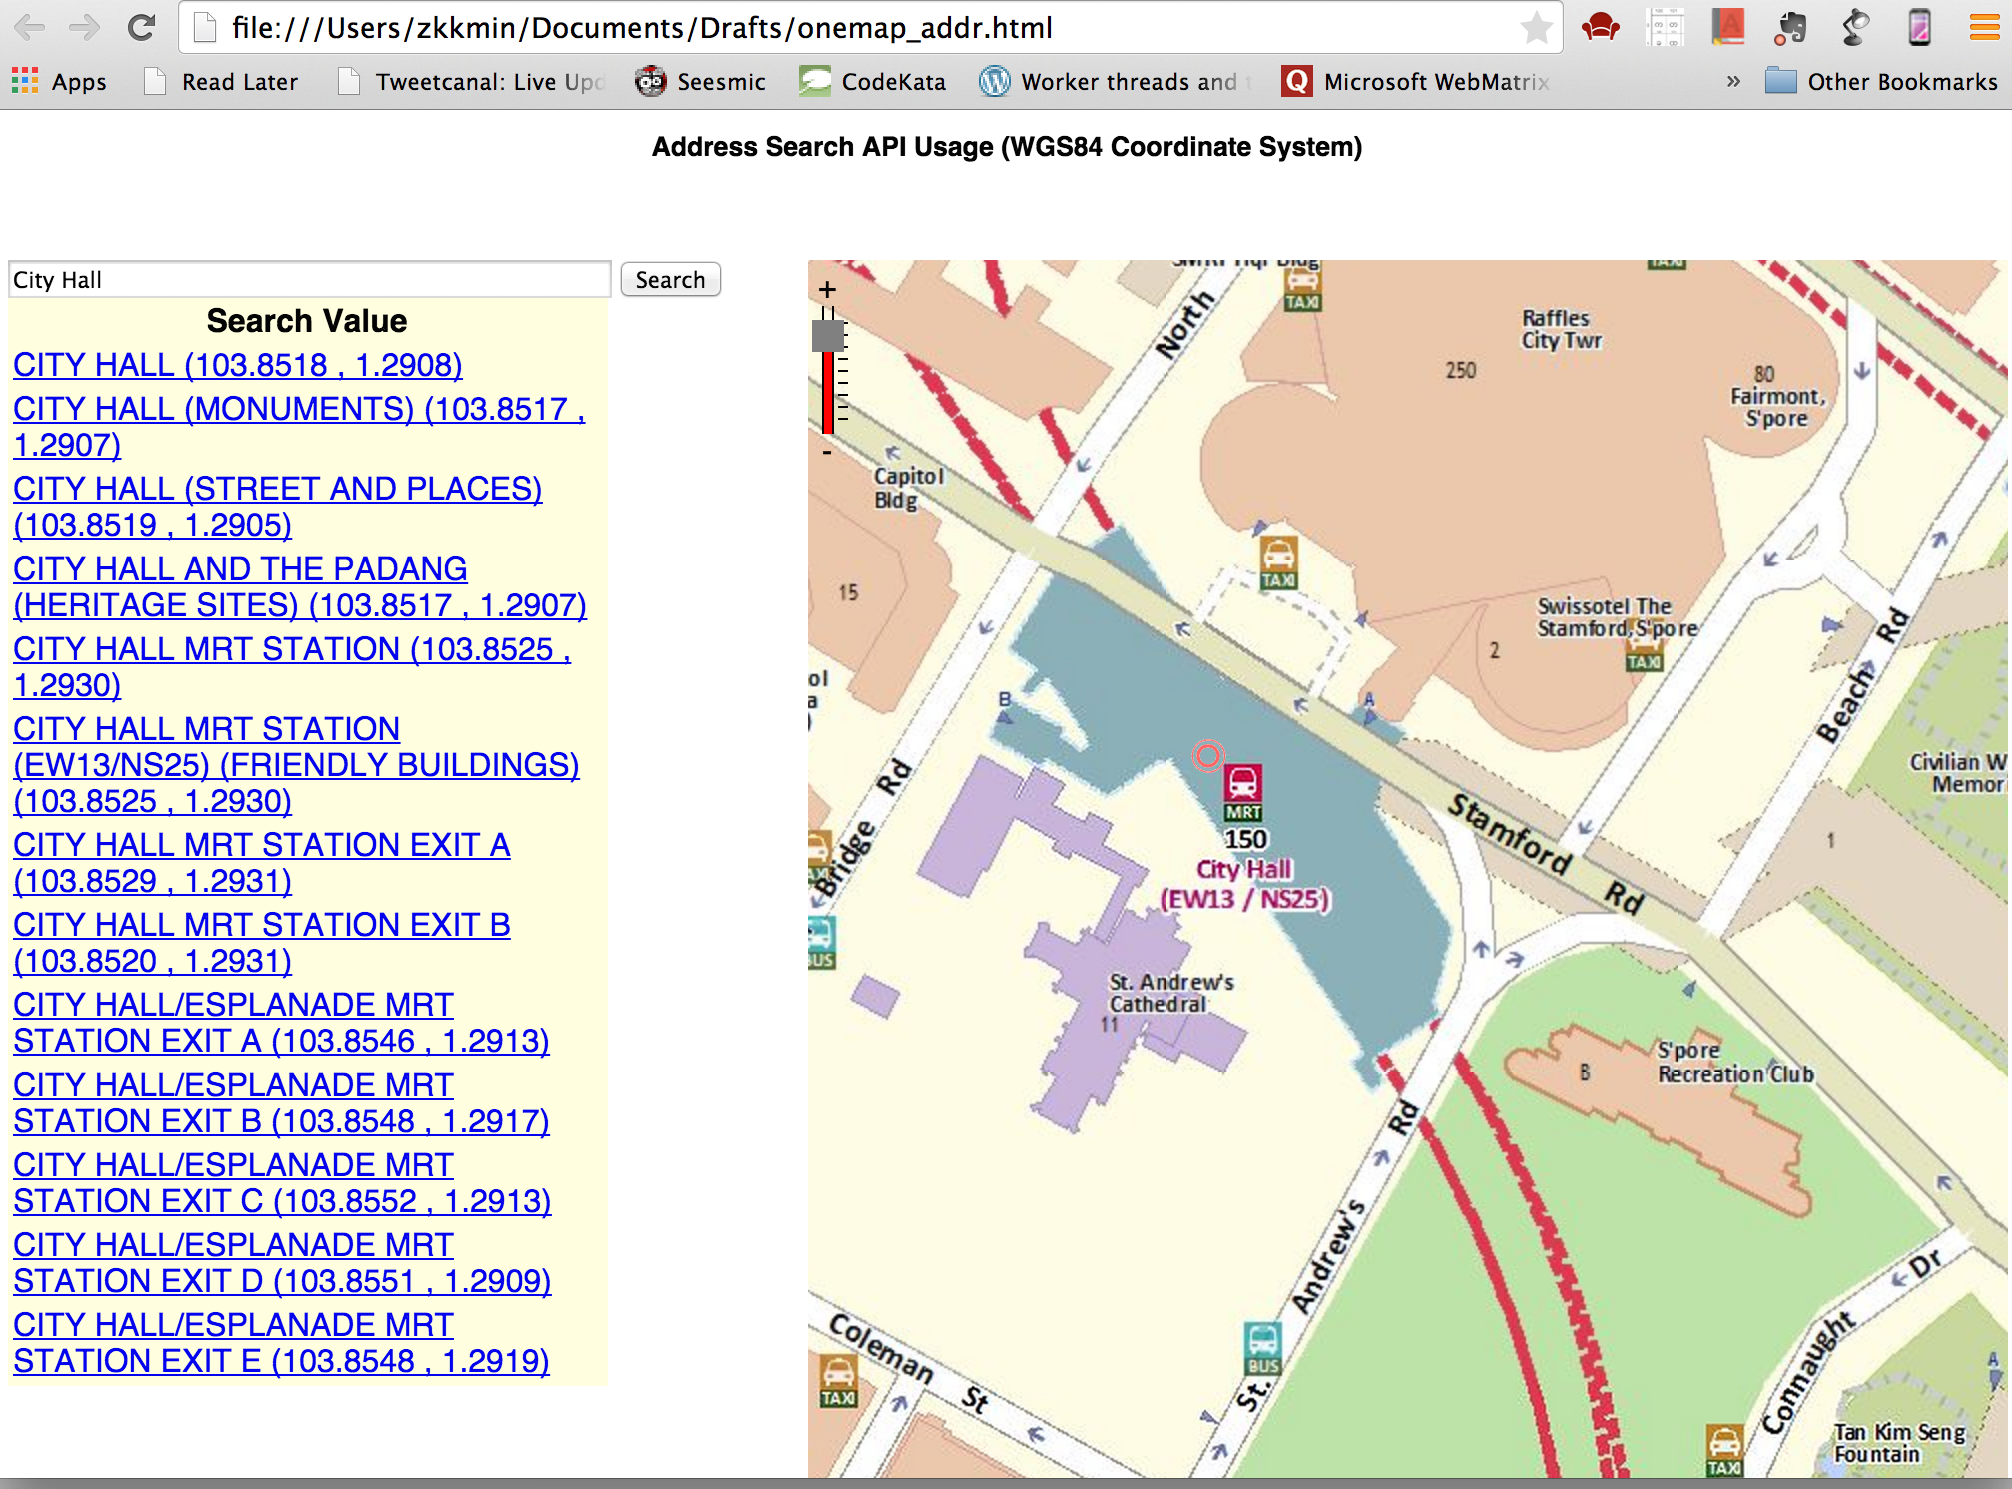
In this tutorial, I will show you how to make responsive UI for web page using flex boxes and media query. I will redesign one of the examples available on OneMap API Help Web Site. We will see how to make pages using OneMap JavaScript API responsive. Please visit the OneMap API address search example to check the original web page.
 1) Inspect the source code
This file contains hidden or bidirectional Unicode text that may be interpreted or compiled differently than what appears below. To review, open the file in an editor that reveals hidden Unicode characters.
Learn more about bidirectional Unicode characters
| <table style="width: 436px"> | |
| <tr> | |
| <th colspan="2"> | |
| Address Search API Usage (WGS84 Coordinate System) | |
| </th> | |
| </tr> | |
| <tr> | |
| <td> | |
| Search Text : | |
| </td> | |
| <td> | |
| <input type="text" id="txtSearchText" value='City Hall' /> | |
| </td> | |
| </tr> | |
| <tr> | |
| <td> | |
| <input type="button" onclick="GetSearchData();" value="Search" /> | |
| </td> | |
| </tr> | |
| </table> | |
| <table> | |
| <tr> | |
| <td> | |
| <div id="divMain" style='width: 500px; height: 500px;'> | |
| </div> | |
| </td> | |
| <td style="vertical-align: top"> | |
| <div id="divResults"> | |
| </div> | |
| </td> | |
| </tr> | |
| </table> |
By inspecting the source code, I found that the page is designed using HTML Table. It is quite a simple page with only a few sections, each section embedded in table cell. I am going to use media query and flex boxes to make the page responsive.
2) Put viewport meta tag in the head of the document.
This file contains hidden or bidirectional Unicode text that may be interpreted or compiled differently than what appears below. To review, open the file in an editor that reveals hidden Unicode characters.
Learn more about bidirectional Unicode characters
| <meta name="viewport" content="width=device-width, initial-scale=1.0" /> |
“width=device-width” indicates the screen’s width in device independent pixels. “initial-scale=1.0” to indicates one to one relationship between CSS and device independent pixels.
3) Convert the HTML Table structure into separate sections as follow.
This file contains hidden or bidirectional Unicode text that may be interpreted or compiled differently than what appears below. To review, open the file in an editor that reveals hidden Unicode characters.
Learn more about bidirectional Unicode characters
| <div class="container"> | |
| <div class="box heading"> | |
| <h2>Address Search API Usage (WGS84 Coordinate System)</h2> | |
| </div> | |
| <div class="box container2"> | |
| <div class="box searchbox"> | |
| <input type="text" id="txtSearchText" value='City Hall' /> | |
| <input type="button" onclick="GetSearchData();" value="Search" /> | |
| </div> | |
| <div class="box results"> | |
| <div id="divResults"> | |
| </div> | |
| </div> | |
| </div> | |
| <div class="box map"> | |
| <div id="divMain" > | |
| </div> | |
| </div> | |
| </div> |
.searchbox and .results are put into .container2 so that they could be moved around together when the screen size becomes bigger.
4) Design smallest view first and use media query for different break points.
This file contains hidden or bidirectional Unicode text that may be interpreted or compiled differently than what appears below. To review, open the file in an editor that reveals hidden Unicode characters.
Learn more about bidirectional Unicode characters
| /* set padding and height to 100% */ | |
| html, body, #mapDiv { | |
| padding: 0; | |
| margin: 0; | |
| height: 100%; | |
| font-family: sans-serif; | |
| } | |
| /* use flex and flex-wrap */ | |
| .container { | |
| display: flex; | |
| flex-wrap: wrap; | |
| height: 100%; | |
| } | |
| /* set all the section stacked vertically in mobile view*/ | |
| .box { | |
| width: 100%; | |
| } | |
| .heading { | |
| font-size: 1.0em; | |
| text-align: center; | |
| min-height: 50px; | |
| } | |
| .heading h2{ | |
| font-size: smaller; | |
| } | |
| .map { | |
| height: 80%; | |
| max-height: 700px; | |
| } | |
| #txtSearchText { | |
| width: 74%; | |
| } | |
| #btnSearch { | |
| width: 20%; | |
| } | |
| #divMain{ | |
| width: 100%; | |
| height: 100%; | |
| } | |
| /* results will be off the screen at first | |
| when the search button is pressed, | |
| it will slide in from the left. | |
| */ | |
| #divResults{ | |
| overflow:scroll; | |
| width: 300px; | |
| height: 100%; | |
| position: absolute; | |
| transform: translate(-300px, 0); | |
| transition: transform 0.3s ease; | |
| background-color: lightyellow; | |
| } | |
| /* Set this property from javascript to make the results | |
| to slide into view */ | |
| #divResults.open { | |
| transform: translate(0,0); | |
| z-index: 101; | |
| } | |
| /* adjust the logo at the bottom of map */ | |
| #OneMapLogo { | |
| bottom: 5px; | |
| } |

5) Slide in the results on the screen when the user clicked the search button.
This file contains hidden or bidirectional Unicode text that may be interpreted or compiled differently than what appears below. To review, open the file in an editor that reveals hidden Unicode characters.
Learn more about bidirectional Unicode characters
| function displayData(resultData) { | |
| var results = resultData.results; | |
| if (results == 'No results') { | |
| document.geElementById('divResults').innerHTML = "No result(s) found"; | |
| return false | |
| } | |
| else { | |
| // Set the divResults class as open to slide in from off screen | |
| var drawer = document.getElementById("divResults"); | |
| drawer.classList.toggle('open'); | |
| ///// | |
| var htmlStr = "<table>"; | |
| htmlStr = htmlStr + "<tr><th>Search Value </th></tr>"; | |
| for (var i = 0; i < results.length; i++) { | |
| var row = results[i]; | |
| htmlStr = htmlStr + "<tr>"; | |
| htmlStr = htmlStr + "<td>"; | |
| htmlStr = htmlStr + "<a href='JavaScript:ZoomTo(" + row.Y + "," + row.X + ")'>" + row.SEARCHVAL + " (" + parseFloat(row.X).toFixed(4) + " , " + parseFloat(row.Y).toFixed(4) + ")" + "</a>"; | |
| htmlStr = htmlStr + "</td>"; | |
| htmlStr = htmlStr + "</tr>"; | |
| } | |
| htmlStr = htmlStr + "</table>"; | |
| document.getElementById("divResults").innerHTML = htmlStr; | |
| } | |
| } |
Edit the displayData( ) function as above to slide in the divResults into the view.
6) Slide back and hide the results list when the user clicked on one of the result, and then show the clicked location on the map.
Add the following code to ZoomTo( ) function to hide the list.
This file contains hidden or bidirectional Unicode text that may be interpreted or compiled differently than what appears below. To review, open the file in an editor that reveals hidden Unicode characters.
Learn more about bidirectional Unicode characters
| function ZoomTo(xVal, yVal) { | |
| // Remove the class open from divResults, | |
| // so that it will slide back out of view | |
| var drawer = document.getElementById("divResults"); | |
| drawer.classList.toggle('open'); | |
| /// | |
| OneMap.showLocation(xVal, yVal); | |
| } |
7) Add media query and styles for break point with minimum width 800px.
This file contains hidden or bidirectional Unicode text that may be interpreted or compiled differently than what appears below. To review, open the file in an editor that reveals hidden Unicode characters.
Learn more about bidirectional Unicode characters
| @media screen and (min-width: 800px){ | |
| .container2 { | |
| width :40%; | |
| } | |
| .map { | |
| width : 60%; | |
| } | |
| #divResults{ | |
| position: relative; | |
| transform: translate(0,0); | |
| } | |
| } |
In a wider screen, container2, which contains search input box and result list, and map area are placed side by side. Result list is put back on screen by setting transform to 0,0.
8) Add media query and styles for break point with minimum width 1000px.
After minimum width 1000px is reached, the contents will stop growing, and left and right margins will be added automatically.
This file contains hidden or bidirectional Unicode text that may be interpreted or compiled differently than what appears below. To review, open the file in an editor that reveals hidden Unicode characters.
Learn more about bidirectional Unicode characters
| @media screen and (min-width: 1000px){ | |
| .container { | |
| width: 1000px; | |
| margin-left: auto; | |
| margin-right: auto; | |
| height: 800px; | |
| } | |
| .map { | |
| height: 700px; | |
| } | |
| .heading { | |
| height: 20px; | |
| } | |
| } |

That is! We have a responsive page using OneMap as base-map. This is just a very simple rework on the existing code and by no means a complete work. But you get the basic idea of how to make your page responsive if you are using onemap api in it.


